by Adam Young | Dec 30, 2014
Before you try and join the Windows 8.1 workstation to the domain you will need to make sure that it has the correct DNS server set
1. Open My Computer (now called This PC)
2. Right click on This PC in the left side bar and open Properties
3. In the Computer name and workgroup settings section click Change Settings
4. Select domain and type the name of the domain that you want the workstation to be joined to
5. Provide the domain credentials that have the rights to join the domain and click Ok
6. Providing Windows 8 can resolve the domain name, and the credentials you supplied are correct it should join the domain successfully
7. Click Ok and Ok again to reboot the Workstation
by Adam Young | Dec 30, 2014
1. Bring up the Settings menu (Press Windows Key+I, or swipe in form the left on a tablet/tablet)
2. Select the available networks icon.
3. Select the wireless network you want to connect to.
4. If you want to always connect to this network tick the box and select ‘Connect’.
5. Type in your security key for the network and click next
6. now you should be connected to your wireless network
by Adam Young | Dec 30, 2014
1. You will need to be on your desktop
2. Right click the taskbar > Properties
3. Go to the Navigation tab and check “When I sign in or close all apps on a screen, go to the desktop instead of start”
4. click Apply and then click Ok to close
by Adam Young | Dec 28, 2014
1. Log on to your domain controller and open group policy
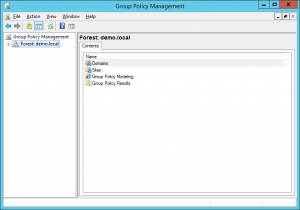
2. Create a new policy
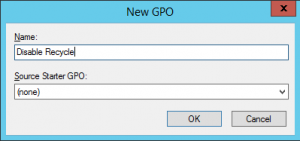
3. Edit the new policy and go to Computer Configuration > Preferences > Windows Settings > Registry
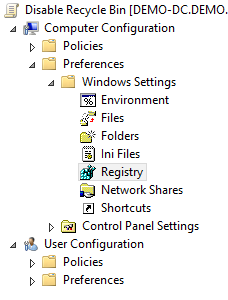
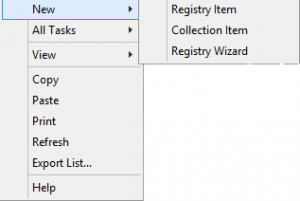
4. Then right click on Registry and select New > Registry Item
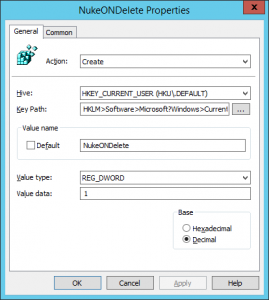
5. Give the new key the following settings
Action = Create
Hive = HKEY_CURRENT_USER
Path = HKLM>Software>Microsoft?Windows>CurrentVersion>Explorer>BitBucket
Value Name = NukeONDelete
Value Type = REG_DWORD
Value Data = 1
6. Once the new policy has been set it is recommended to force a GP Update on each workstation to take effect
by Adam Young | Dec 28, 2014
1. Open Exchange Admin Center (EAC)
2. Click on “Servers” on the left hand side > Virtual directories
3. Click on “Configure external access domain”
4. Under Select the Client Access servers to use with the external address, click Add+
5. Select the servers that you want to configure and then click Add.
6. Click “OK”
7. Enter the external DNS hostname that you want to use for external e-mail access
by Adam Young | Dec 27, 2014
Why would you want to assign a certificate in exchange?
- So your staff know that the site is safe
- Your staff don’t get any annoying nag screens about the certificate not being correct for the domain or is not trusted
- Or maybe the current certificate has expired
So if you want to learn how assign a certificate in Exchange 2013 follow the easy steps below!
1. Open Exchange Admin Center (EAC)
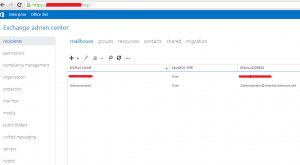
2. Click on “Servers” on the left hand side > certificates
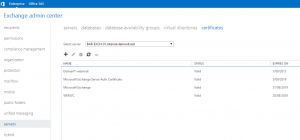
3. Double click on the SSL certificate that you want to assign
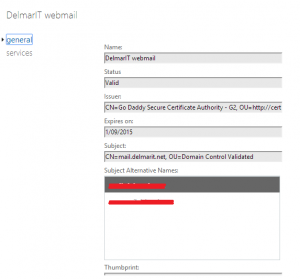
4. Click “services” and then place check marks next to the services that you would like assigned to the SSL Certificate. SMTP, IMAP, POP and IIS are standard. Note: If you have a Wildcard SSL certificate then leave IMAP and POP unchecked, Wildcard certificates do not work for POP/IMAP.
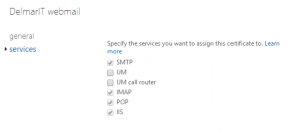
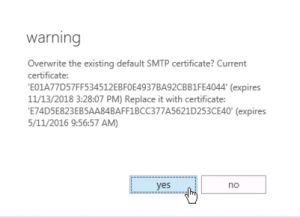
5. Click “Save” (on clicking save you will get a standard warning message which indicates the default self signed cert will be replaced with your new third party SSL certificate
by Adam Young | Dec 26, 2014
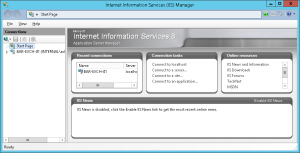
1. Open IIS manager on the Client Access Server
2. Click on “Default Web Site”
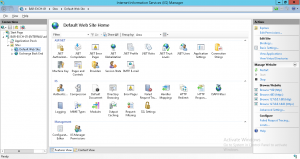
3. Click on “HTTP Redirect”
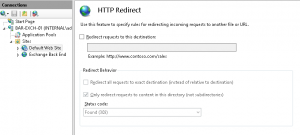
4. Check “Redirect requests to this destination” and enter the absolute path to OWA, Also make sure you check “Only redirect requests to content in this directory (not subdirectories)” . Make sure the selected status code is “Found (302)”. Then click “Apply”.
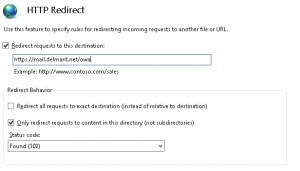
5. Because any redirection configured on the “Default Web Site” is propagated to the lower-level virtual directories (vdirs), you must remove the redirection setting on all existing vdirs. You do this by clicking on each vdir and from here on the “HTTP Redirect” button. Now simply uncheck “Redirect requests to this destination” followed by clicking “Apply”.
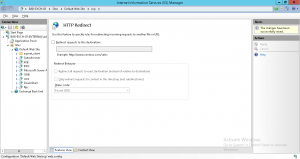
6. last thing to be done is disable the SSL requirement on the Default Web Site
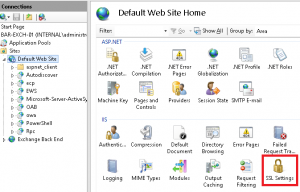
7. On the SSL Settings page, uncheck “Require SSL”.
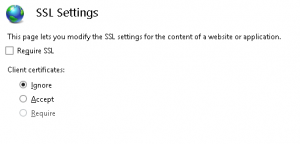
Note: If you don’t uncheck the SSL requirement, you will get an HTTP 403 Forbidden: Access is denied error.

by Adam Young | Dec 26, 2014
have you ever seen this error, well its easy to fix

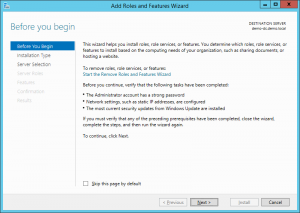
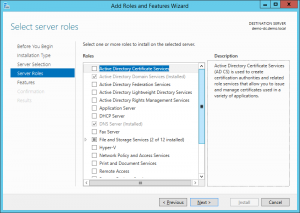
1. Open the Server Manager console, click “Add roles and features”
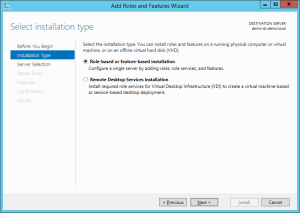
2. Select “Role-based or feature-based installation
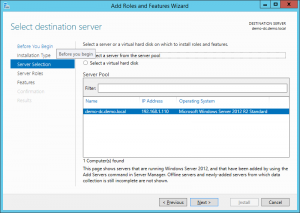
3. Choose the server from the server pool
4. Click next on the Server Role screen
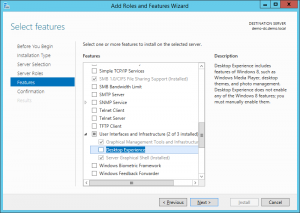
5. On the Features screen scroll down till you see “User Interfaces and Infrastructure” expand these features and check “Desktop Experience” and click next
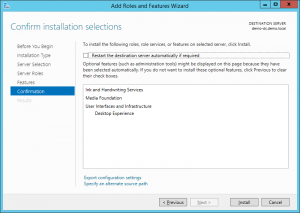
6. On the Confirmation screen click on “Install” to install the feature (note: you may need to restart your server to install this feature)
by Adam Young | Dec 26, 2014
With pfSense you can set a max of 4 DNS servers if you wish to do so
1. Open the pfSense admin webpage

2. Once logged in go to System > General Setup
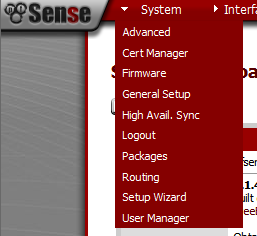
3. In the DNS servers section add the DNS servers that you want the server to use

4. Click Save at the bottom of the page and your done

by Adam Young | Dec 25, 2014
1. Log on to your domain controller and open group policy

2. Create a new policy
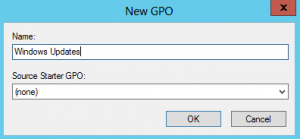
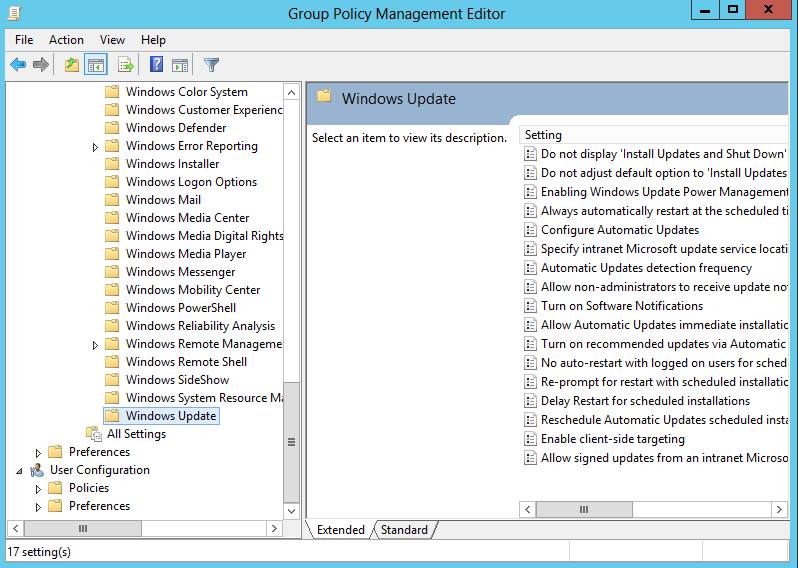
3. Edit the new policy and go to Computer Configuration > Administrative Templates > Windows Components > Windows Updates
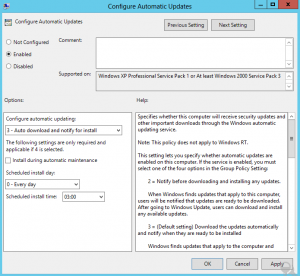
4. Double click on “Configure Automatic Updates” select “Enabled” then OK
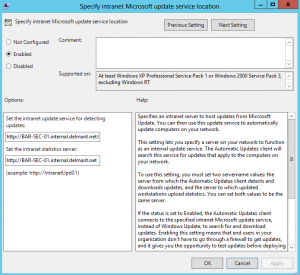
5. Double click on “Specify intranet Microsoft update service location” specify the server name in both boxes then OK
6. Workstation and server can take some time to be shown in the WSUS console so its a good idea to approve the updates before setting this group policy
Watch Video on how to configure group policy for WSUS
[jwplayer mediaid=”232″]


